Daily Immersive - 045
2026-01-07
Work Structure
- gemoetry node를 사용해서 오브젝트 만들기
- 오브젝트를 공간에 임포트하기
- Shader Graph 적용해보기
JUST DO IT
모르거나 헷갈리는 것을 정리하며 나아가기
-
RCP Shader Graph
- Unity와 같은 엔진 툴과는 다르게 계속해서 타입을 신경써주어야 함
-
Blender Geometry
- 블랜더에서 다 만들어서 텍스쳐로 가져오는게 의미가 있을 때도 있지만, 지오메트리 노드로 모양을 흥미롭게 만들고, 쉐이더는 따로 RCP에서 하는게 속 편할지도..
-
RealityKit View + Toolbar
- window group이 없는 상태, 즉 full immersive view에서 툴 바를 띄우기 위해서는 attachments를 사용해야 함
struct ImmersiveView: View {
@State private var enlarge: Bool = false
var body: some View {
RealityView { content, attachments in
// Add the initial RealityKit content
if let immersiveContentEntity = try? await Entity(named: "Immersive", in: realityKitContentBundle) {
content.add(immersiveContentEntity)
// attachment를 3D 공간에 배치
if let textAttachment = attachments.entity(for: "description") {
textAttachment.position = [0, 1.2, -1]
content.add(textAttachment)
}
}
} attachments: {
Attachment(id: "description") {
VStack(spacing: 8) {
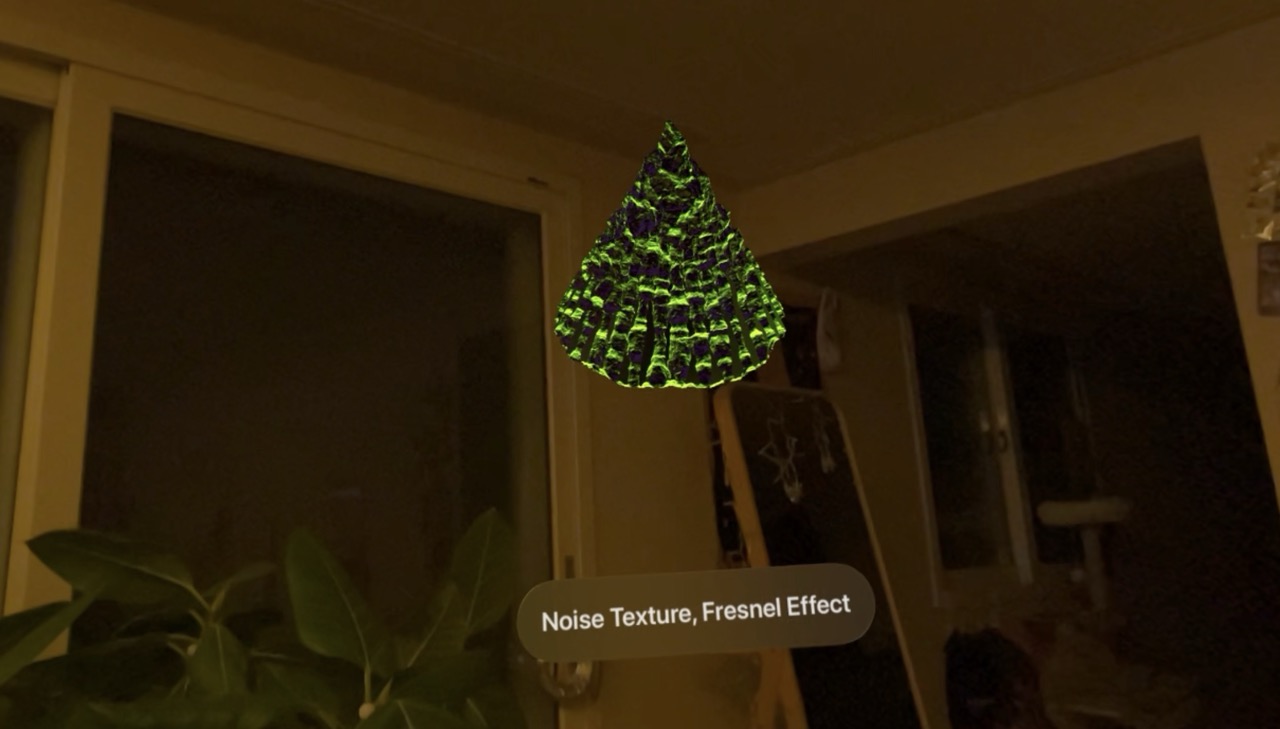
Text("Noise Texture, Fresnel Effect")
.font(.title)
.fontWeight(.semibold)
}
.padding(24)
.glassBackgroundEffect()
}
}
}
}
- 클로저의 구조
RealityView { content, attachments in
    // 1️⃣ 3D 모델 로드
    if let entity = try? await Entity(named: "Immersive", in: bundle) {
        content.add(entity)  // 2️⃣ scene에 추가

        // 3️⃣ SwiftUI attachment를 3D 엔티티로 가져오기
        if let textAttachment = attachments.entity(for: "description") {
            textAttachment.position = [0, 1.2, -1]  // 4️⃣ 위치 설정
            content.add(textAttachment)  // 5️⃣ scene에 추가
        }
    }
} attachments: {
    // 6️⃣ SwiftUI 뷰 정의 (이 코드가 먼저 평가됨)
    Attachment(id: "description") {
        VStack {
            Text("Noise Texture, Fresnel Effect")
                .font(.title)
        }
        .padding(24)
        .glassBackgroundEffect()
    }
}
Result
One Line Summary
비전프로의 해상도가 잘 나오니 확실히 쉐이더 그래프도 재밌는 것 같음